Exploring the wild side of the Costa Blanca
Exploring the wild side of the Costa Blanca
This site contains affiliate links, so I might receive a commission if you click and buy something. It doesn´t cost you any extra, but I could treat myself to some extra snacks to keep me going on my outdoor adventures! Read more in my Privacy Policy
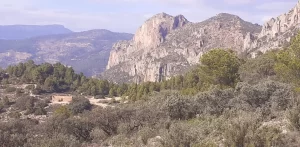
The mighty Cabeco dor is the 8th highest mountain in the Costa Blanca, reaching a height of 1,209 metres above sea level (or 1,210 metres if you stand on the geodesic point!)
It is situated in the Alicante Province, very close to the town of Busot, which is situated perfectly between the sea and the mountains (with Campello hosting the nearest beaches).
Busot is famous for “Las Cuevas del Canelobre” (the Canelobre caves), which is one of the largest and most visited caves in the Valencian community.
Canelobre is also a popular climbing spot, home to a staggeringly high vertical wall situated directly above the cave.
It is also fairly close the town of Jijona, situated further inland, which is famous for its Turrón (nougat). This is a result of the extensive almond orchards that were originally cultivated by Moorish farmers.
Cabeco dor (or Cabeçó d’Or in Valencian) means “Golden head”. However, the “gold” refers to the water (rather than the mineral), which used to flow down into the Canelobre caves.
However, Cabeco dor is also the name of the mountain range, as well as its highest summit.
There are many different routes up to Cabeco dor, but even the easiest, official hiking route is quite demanding for the average hiker, due to its altitude, and rocky section leading up to the col.
There are various scrambling routes that vary in difficulty, with some involving rappels to descend.
Finally, there is an easy K2 via ferrata. Something for everyone, eh?
Looking for ESSENTIAL OUTDOOR GEAR for your mountain adventures?
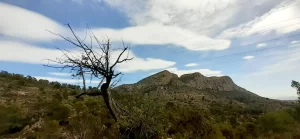
This route is a challenging hike, moving up wild ground in order to ascend to the Cabeco dor summit.
It starts off with a very pleasurable gully scramble, followed by several (optional) small rocky sections that you can choose to scramble up, or pass by.
You can choose to make this route as easy or as difficult as you like, which makes it suitable for groups with varying capabilities.
If you want to avoid the steeper parts, there are a few alternative options along the way, allowing you to make the route easier and quicker.
There are also a couple of small caves for you to explore on your way up, as well as a bonus cave on the way down.
Finally, there is a nice peaceful walk back.
Recommended gear for hiking:
SCARPA MOJITO Adult hiking shoes (unisex)
Breathable, durable and comfortable
10 colours available
This Cabeco dor route consists of:
*I was out on this route for almost 5 hours. However, my actual “moving time” was closer to 3 hours.
I was definitely taking my time and enjoying the day (e.g. taking photos, scrambling and texting my friends), and I also stopped for two short breaks (e.g. to eat, and to wait for my phone battery to recharge a little). So, it could have taken less time.
However, there are also extra opportunities to explore, such as the 902m summit and the Cueva de las Dones, which would extend the time further.
Therefore, I suggest allowing at least hours to complete this route.
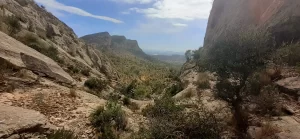
This Cabeco dor route is steep all the way from the beginning of the gully scramble to the summit (where you gain 457m of height over 1.6km). It really is relentless!
The terrain is also wild, since the ascent is largely unofficial, only meeting a path at the col (“Coll Alemany”).
Once you reach Penya Redona, it becomes a little easier, but there is still another 232m to reach the summit.
To descend, there is a big scree path (although this is avoidable).
Only the second part of the return route is a guaranteed, easy official path.
Alternative options:
However, if you want to make this Cabeco dor route slightly easier and less wild, you can transfer to the official path to:
The Cabeco dor route is suitable for:
The route is not suitable for:
You could complete this Cabeco dor route any time.
However, I recommend that you avoid the middle of summer (e.g. July and August) because it is very hot, the route is south-facing, and there is no shade.
In Spring/Autumn, I would usually suggest that you start the route in the morning, to avoid the warm afternoon.
However, I did this route at the end of September, in the middle of the afternoon, on an overcast day, and it was fine.
To begin this route up to Cabeco dor, park here.
(Google Maps™ mapping service is a trademark of Google LLC and this blog is not endorsed by or affiliated with Google in any way)
To get here from the main road (CV-774), turn right onto Camí de la Partida Placita de Cabeçó, which is signposted as “Partida PLÁ CABECO SECTOR”.
There is a dedicated gravel parking area suitable for up to 6 cars.
You can follow my route to Cabeco dor here.
To begin the Cabeco dor route from the car park, walk straight up the road for a few minutes. The road will soon turn into a gravel track, with prohibited vehicle access.
Like wild camping in a tent or bivvy bag under the stars?
Small paths
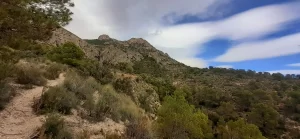
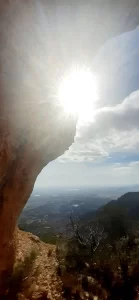
On the track, you will reach a “crossroads” with small tracks leading left and right. Turn left here, and you will start ascending gradually and get some great views towards the sea.
Although it was misty when I did this in September.
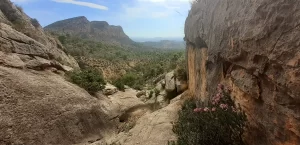
Cave/crack
At 0.5km there is another small path left which leads directly to towards a cave/crack that I wanted to explore.
However, if you go directly to the cave, you will miss out on the beginning of the gully scramble.
You will see from my route that I started to walk towards the cave/crack, but then I changed my mind…So, don´t follow this detour or you will miss out!
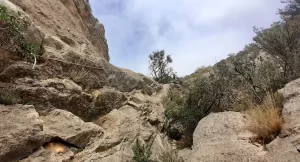
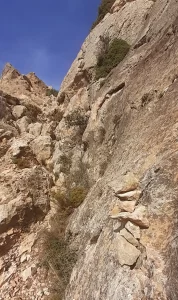
Gully scramble
From the bottom of the gully, the steep ascent begins, and will continue all the way to the Cabeco dor summit.
The gully scramble is not too difficult and very enjoyable.
I only wish that it was longer!
Cave
On your way up the gully, you can take a short detour up to the cave/crack which you will see easily on the left.
I scrambled up to into the cave at the back and went out of the crack at the front. Then I scrambled up on some higher rocks.
However, climbing up into the crack is better.
To move between to the gully and the crack at the front, you can choose:
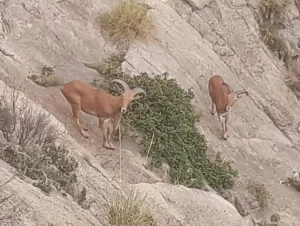
I was hugging the rock here when I saw the first of many ibex on this route.
To me, the presence of these wild animals confirms that these are my kind of mountains!
Anchor
After the cave you will reach an anchor, which you could attach a rope to, in order to help other less-confident people ascend, and/or to descend.
However, it is not necessary for scrambling unless you are in a group with beginners.
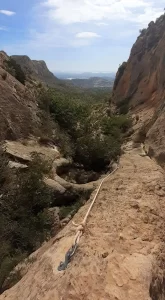
Rope
Further up the gully there is a fixed rope just a few metres long, that is set up to be used as a handrail on a small steeper section.
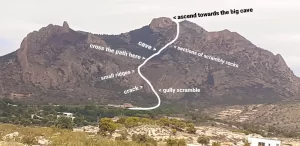
Where to go?
From here, my route does not follow any path until very close to the Cabeco dor summit.
Therefore, you do not need to follow my route exactly.
I did, however, head for most of the scrambly rocks!
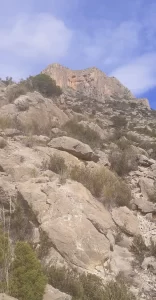
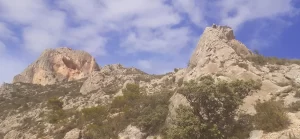
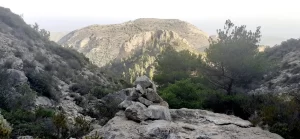
As a general guide, you should head in the direction of the big cave in the uppermost rock.

Want to visit two MAGNIFICANT LIMESTONE ARCHES in Castell de Castells?
Sections of scrambly rocks
After the rope that brings you out of the gully, the area widens out. From here you can choose to:
Two small ridges (optional)
First you will see an obvious ´ridge´ section of rocks right ahead of you, which you can scramble up.
This gives you a great view of the gully below, as well as a smaller mountain on the opposite side of the track, which is the home of El Tocayo and Jamón climbing areas.
Warning!
On this ridge, there are some rocks on that are not attached. So, make sure you that you check them first.
For example, you can:
If you are unsure, you can do the same with several other rocks to compare the sound. In particular, you should compare it to the sound of a large, obviously secure rock
After this first ridge, you will see another small ridge/rocky area that you can scramble up…
Recommended gear for running:
GARMIN Forerunner 225 Running Smartwatch (Navy)
With GPS, Garmin Pay and 2 week battery life
Official path
The second small ridge scramble will lead you up to a small flat clearing where the official path to Cabeco dor traverses the mountain.
This challenging route crosses over the path and continues heading straight up the mountain towards the rocks to the right for more scrambling.
This section is steep and wild. Just how I like it!
Alternative option:
If you prefer to hike from this point, then you can follow the path* to the left, which will lead you around the other side of the mountain and to the summit.
*You can see this route as a black dashed line on my route to Cabeco dor if you choose the Topographic – Raster Map (IGN) map option at the top right corner of the map.
This route is slightly longer but would take less time since the terrain is easier.
Looking for some EASY CLIMBING grades (III, IV, IV+ and V) in SELLA?
Cave
You will reach a small west-facing cave.
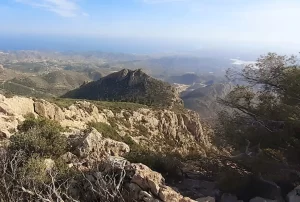
Why not treat yourself to a little rest in here and admire the mighty Canelobre Ridge! An iconic ridge scramble on the Cabeco dor mountain range.
Scrambly sections (optional)
After the cave, as you continue ascending, you will see two more sections of rocks to the left and another to the right.
I scrambled up the first one and the view was outstanding!
Summit (902m)
On your right (at 1.8km on my route to Cabeco dor) you will see a nameless summit pointing out towards the sea.
TOP TIP for Explorers:
Extend the route and maybe enjoy a bit more scrambling by taking a detour to this 902m summit.
I didn’t go to this summit because I started the route in the afternoon and didn´t want to run out of daylight!
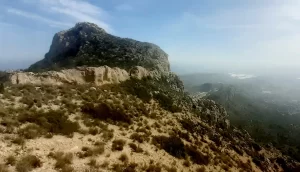
Penya Redona (big cave)
The walking is a little easier now as you approach the big cave that you have been heading towards (situated on Penya Redona).
Unfortunately, the cave is way too high to access, but it looks pretty awesome!
You will ascend at the right side of the cave, to the flat area above it.
Normal hiking
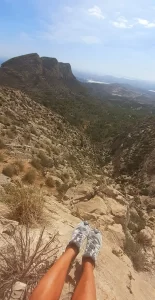
From here, you can enjoy a little ´normal´ hiking along the top, which is fairly flat.
There is no official path here, so simply head towards higher land!
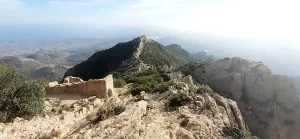
Ruin
If you walk along the left edge of this area, you will see the official path down to your left, as well as the ruin, which is a prominent feature on the official Cabeco dor ascent.
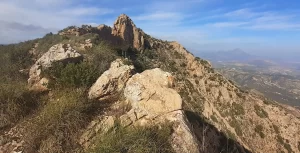
Ridge
You will head towards a rocky ridge with a big steep gap in the middle, which definitely not for scrambling.
I didn´t look to see whether there was any fixed gear in the walls, but the far wall is a lot higher! It could only be for abseiling or serious climbing, if there were any.
Want to go MOUNTAIN BIKING or HIKING through a RUSTIC LANDSCAPE near Aspe?
Detour off the ridge
There is a small cairn (i.e. stack of rocks) on the left, allowing you to bypass the impossible scramble.
Very soon after the cairn, there is a small scramble down a “wall” on your right just before a tree.
From here, you follow a short trail through the bushes, staying close to the steep wall.
After a few minutes, we scramble back up!
There is a second cairn, indicating the rocky route back up to the ridge.
Coll Alemany
I have seen two different names for this col, on two different hiking apps: Coll Alemany and Coll de l´Aresta del Cabedo Dor, but I will refer to the former, since that is the name on my route.
After 5 minutes of easy walking you will reach the col, and meet the official path that leads to the Cabeco dor summit.
Cova de la Granota (ruin)
You will pass Cova de la Granota on the way up to the Cabeco dor summit.
This is a ruin, despite having “cave” (“cova”) in the name!
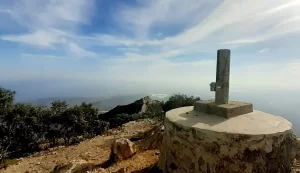
Cabedo Dor summit
The Cabedo Dor summit is 1,210 metres high and from there you can enjoy 360-degree panoramic views.
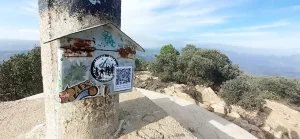
At the summit there is a geodesic point with a postbox attached to it that contains a notebook where you can register your visit.
Wild route down from the summit
To return, I passed the summit and descended down a path that is on my hiking application called “Pujada sud-est al Cabedo Dor”.
However, after a few minutes the path was not visible at all.
I didn´t take any photos, because I was busy trying to find a path!
Therefore, you there is no need to follow my route exactly. You can simply choose your own path. However, you will need to either start here and either:
Alternative option:
You could avoid this wild part by descending from the summit on the official path to the col, which is situated much closer to, and directly above the top of the Barranco del Barbero.
Therefore, it would be much quicker and easier to access.
I didn´t do this because I prefer to do circular routes, rather than walking back on the same path, even if they are tougher!
Looking for GUIDED TOURS to transport you to secret corners of the Costa Blanca?
Barranco del Barbero
The Barranc del Barbero is actually a very long and steep screen path!!
Again, I didn´t take any photos, because I was busy trying to stay on my feet!
When heavy rain occurs, it will run down this gully, but mostly it is dry and full of loose rocks.
I suggest that you do not to walk straight down the scree, because it will be difficult underfoot (unless you like that kind of thing!)
Instead, I recommend that you walk along the left side of the scree path, descending in a zigzag formation This is what I did, which you can see on my route.
Warning!
Make sure you are insured when you travel to Spain, in case something does happens!
Alternative option:
If you want to avoid the scree-filled Barranc del Barbero altogether, you can descend from the summit on the official path to the col, they turn right to go back on the official path* on the far side of the mountain.
Initially, the path is a bit of a scramble, but after that it is easy walking.
This option involves returning on an entirely different path to my route. This official path (that you cross on the way up) descends fairly close to the ascent, so the views will be the same.
*You can see this route as a black dashed line on my route if you choose the Topographic – Raster Map (IGN) map option at the top right corner of the map.
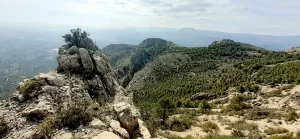
However, you would miss out on the stunning landscape after this point, which is absolutely worth walking through…
After the scree path, the ambience really changes too.
The hard work is over, and now you can enjoy a really delightful walk back.
Here, it is a completely different vibe to the “popular” side of Cabeco dor, with lots of ibex roaming the land, and not another person to be seen!
Easy walking after the cairns
First you will see a very small cairn. Just keep going.
When you reach the bigger cairn (at 4.9km), cross over to the right of the gully.
This will turn into a nice easy-to-follow path with easy walking back down the Cabeco dor mountain.
Peñon del Barbery / Peñon del Llam
The clear path passes this peak on the right-hand side.
TOP TIP for Explorers:
If you would like to walk over this peak, it is 812m high (an extra 49 metres above the path).
Recommended gear for winter:
SAGUARO Barefoot Boots (unisex)
Water resistant with wide toe, rubber sole and fur lining
Forest
You will pass through a nice little forest area.
After this, veer right where the path splits into two, meeting the official PRCV-226 hiking route, which passes along the southern side of the Cabeco dor mountain range.
Now, you will follow this very clear path all the way down the valley.
Cueva del les Dones
TOP TIP for Explorers:
There is a cave, quite close to the path, which I missed when I did this route!
As you pass the tree covered mountain on your left, you will walk towards a rocky mountain right ahead of you.
From the photos I have seen, I can´t actually tell whether the cave is on the right or left-hand side of the rocky area.
However, this whole area looked really interesting on the way up to Cabeco dor, so why not go and explore!
Then you could meet the main path further down here.
Electrical towers
Once you pass the first old electrical tower, you will turn right at the “T-junction” (then you will see lots of electrical towers down in the valley).
Follow signs for “Busot”, and then “Pla de Cabecó”
Then I took a left back to the car park, through some trees, just to make sure that the route way 100% circular.
Enjoy!
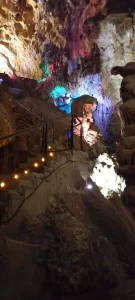
While you are there, I personally recommend visiting the Canelobre caves. Check out this guided tour of the Canelobre caves in Busot with transportation from Alicante.
These are definately the most impressive caves that I have ever visited! They are also situated high up on the side of a mountain with incredible scenic views.
What to travel in style? Check out these cool tours…
Looking for a unique immersive dining experience? Dine with hosts in their own home (or land or water!)
For example…
…or buy a gift card here
Why not buy me a coffee
to keep me going on my adventures
so that I can share them with you!
Wild Child Costa Blanca